Back to CrisisManager Main Menu
Creating a New Plan
In a brand new account, you will create your first plan(s) using a template in the system. After you have completed at least one plan, you can create others by copying the original plan into a new one and making modifications. This is helpful when you need to create multiple plans with minor differences.
Creating a Plan from the Template
- Click on the Plans tab and then click on Create Plans from Template.
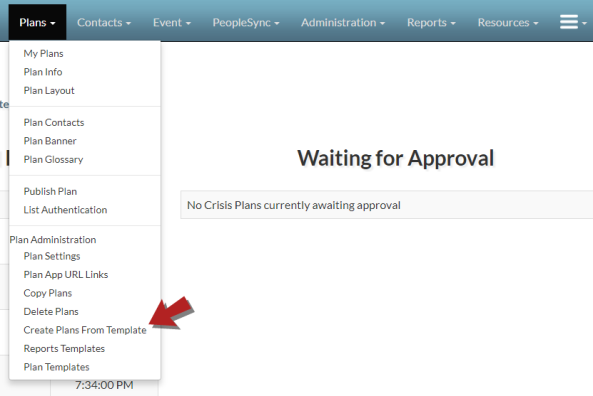
- Select the Number of Copies. This is the number of new plans you want to create from the template. *Note: If you need to create multiple plans with minor differences and you have the ability to Copy Plans in the system, you may want to select 1 new plan to create from the template. Then copy your completed plan to make new ones and modify them as necessary.
- Click Create Plan(s) From Template.
- Your new plan will now be listed at the bottom of the My Plans screen.
- Click the Edit button next to your new plan.

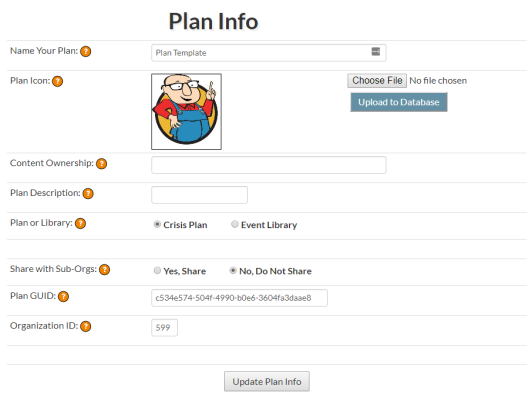
- On the Plan Info screen, you can Name Your Plan. This will be the name your end users see when they search for your plan in the CrisisManager app.
- You can also upload a Plan Icon by clicking the Browse button and selecting the image file from your computer. Click Upload to Database to set your image for this plan. This image will appear next to the Plan Name in the CrisisManager app. *Note: For best results, use an image that is 64px by 64px.
- Enter information for Content Ownership if needed. This will let readers know who owns the content in the plan.
- Enter a brief Plan Description.
- Click Update Plan Info.
Changing the Appearance of the Plan
Now you can click on the Plan Layout link from the Plans Menu at the top of your screen.
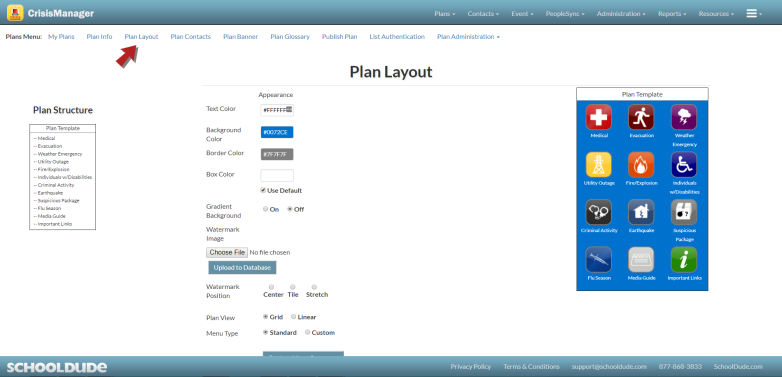
- The Appearance section allows you to control what the plan will look like on the user's device. You can select the Text Color, Background Color, and Border Color. Enter the Color Hex Code in the boxes or you can select a color from the palette that will pop up when you click on the field.
- Select On or Off to apply or remove a Gradient to the background color.
- You can also add a Watermark Image to the background. If you choose to use a watermark image, be aware that very busy or colorful images will make it hard to read the Event titles on the screen.
- The Plan View option allows you to select whether the event tiles are shown in a Grid view or a Linear list view.
- You will be able to see any changes that you make on the preview screen to the right. It will show exactly what a user would see on their smartphone.
Editing and Deleting the Template Events
The system has created 14 new events from the template. Only the first event (Medical) has content in the event. The other 13 have Event Titles and Icons but no other content.
- Click on the Event Icon in the Plan Layout to view and edit the details of that event. You can change the title and icon to become a completely different event if needed. See more information about editing events in the Creating an Event guide.
- If you need to delete one of the Template Events, click on the Event tab and then click on Event Sequence.
- Here you can move the Events into a different order or remove one by clicking the Delete Event button.
Copying Plans
A quick and easy way to create multiple plans that share a lot of the same information is to use the Copy Plans feature. This allows you to copy the information from a completed plan into a new one. This feature may not be available to every administrator.
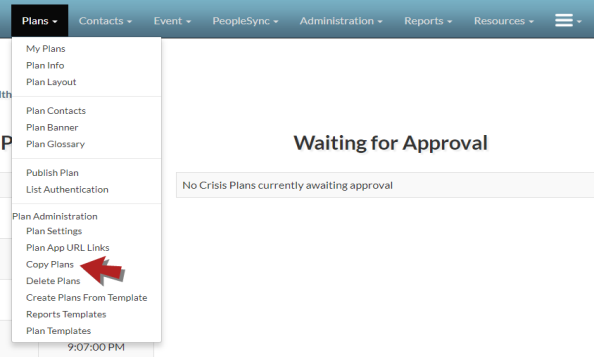
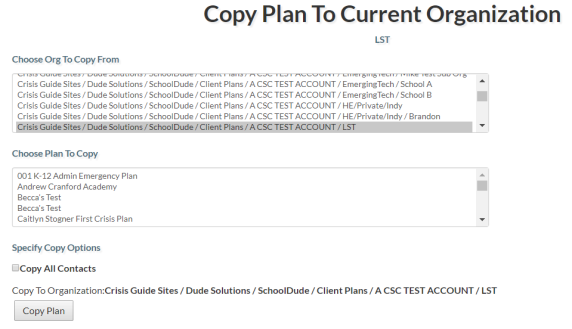
- Click on the Plans tab and then click on Copy Plans.
- If you have sub-organizations in your account, you may need to select the organization from which you are copying the plan.
- Select the name of the plan that you are copying.
- If you would like to Copy All Contacts to the new plan, be sure to check the box.
- Click Copy Plan.
- The screen will refresh to the Plan Info screen. Edit the Name of your Plan and any other information on this page and click Update Plan Info.
- Follow the same steps listed above to change the appearance of the plan and make edits to your events.
